
The best part about this cake (besides the flavor) is that it’s flexible enough that you can change the fruit toppings up to reflect what is in abundance in your gardens, farmer’s markets, U pick farms, or what fruits you have canned up yourself.
It’s a great way to slow down with a sweet treat and savor the flavor of the seasons, and it’s an easy mix and dump type cake recipe.
Here I go into tools you need, ingredients, instructions on how to make this Upside-Down Yogurt Cake.
Let’s Dive In…
- Yogurt Cake Recipe, using Seasonal Fruit Toppings
- Fruit Toppings Suggestions & How to Prepare Them
- That’s it!
Yogurt Cake Recipe, using Seasonal Fruit Toppings
Tools you Need
- 9-inch cake pan
- Parchment paper, cut to the shape of the pan
- Mixer bowl, or Stand Mixer
- Flour Sifter
Ingredients
- 1 cup (2 sticks) of room temperature butter (can substitute with coconut oil)
- 1/2 cup white sugar
- 1/2 cup brown sugar
- 1-2 teaspoons vanilla extract
- 3 eggs, room temperature preferred
- 1 cup yogurt, can be plain or vanilla yogurt
- 1 cup flour
- 1 teaspoon salt
- 1 teaspoon baking powder
- 2 teaspoons cinnamon
Instructions
- Preheat your oven to 350 degrees. Cut your parchment paper to fit the bottom of the cake pan. Oil your cake pan, so your parchment paper can stick well and won’t slid. Set aside.
- Prepare your fruit. See Fruit Toppings Suggestions & How to Prepare it below for specific instructions. Place fruit/ syrup at the bottom of the cake pan, on top of the parchment paper. Set aside.
- In your stand mixer start with your wet ingredients: first, add your butter and sugars to your bowl. Mix until creamed together.
- Add vanilla, eggs, and yogurt. Mix until combined.
- In a separate bowl, with your flour sifter, put your flour, salt, baking powder, cinnamon in. Sift.
- Add your flour mixture to the wet ingredients. Mix on Low until well combined.
- To your cake pan, carefully pour your batter on top of the fruit. Do not mix your fruit and batter together. It’s okay if some syrup seeps up the sides of the pan.
- Bake at 350 degrees for 40-45 minutes, or until the toothpick comes clean.
- Allow to cool on a wire rack for 1 hour.
- After one hour, it should be cool enough to touch. Take your cake plate and place on top of the cake.
- Flip over, carefully removing the cake pan.
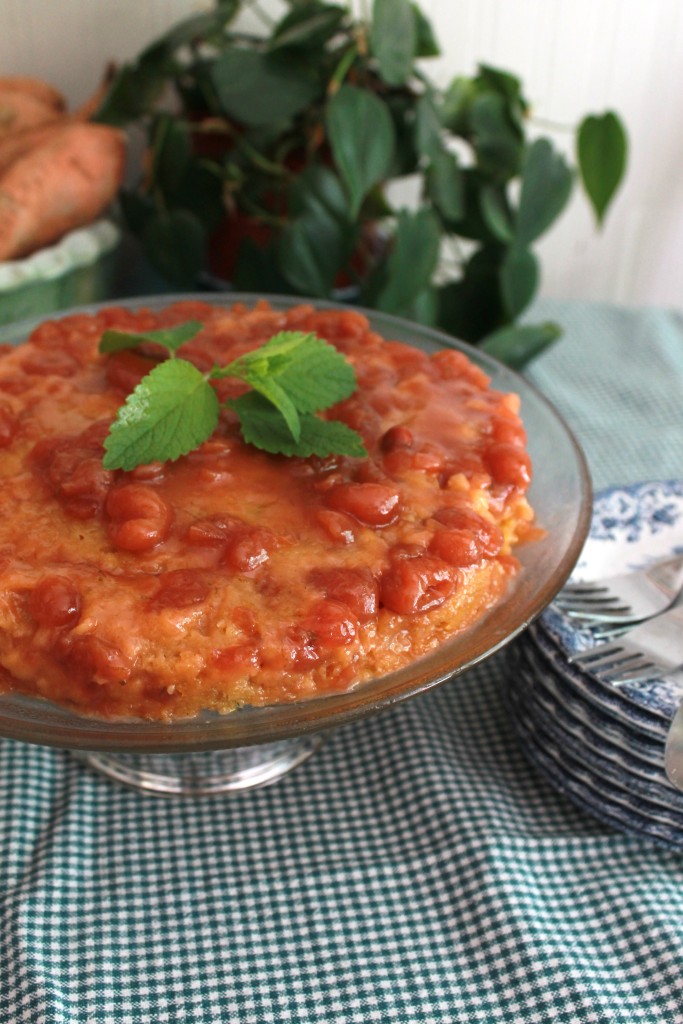
- Clean the edges, add a sprig of mint or lemon balm for garnish, and enjoy!

Fruit Toppings Suggestions & How to Prepare Them
Most of these fruits that go well with this cake can be used fresh, frozen, slightly cooked, or canned.
Fresh: Simply cut, peel if necessary, and place on the bottom of the pan as is. You can sprinkle some sugar on top, or not. Minimal syrup/juice will be made, and the fruit should keep its shape the best.
Frozen: Frozen fruits work just as well as fresh but thawing them halfway does work best. The cold temperate of the frozen fruits can make the bake time longer. You can just put the halfway frozen fruits as is on the bottom of the cake pan. Some juice/syrup will be made, and the shape of the fruits should hold a bit.
Slightly Cooked: In a saucepan, place your fruit and some sugar on medium heat. Slightly cook the peeled and cut fruit until it’s soft around the edges and sugar is dissolved (should only take a few minutes). This will give you a great fruit syrup that will penetrate the top and side layers of the cake. Fruits don’t hold its shape as well, but it doesn’t turn into a puree.
Canned: I will always suggest your personal canned goods, because you can really have fun and get lots of canned fruit up on the shelves, with some you can’t even find at the store (for example, I’ve never seen rhubarb preserves at the stores). But storebought canned fruits will work, especially pie fillings. You can leave them room temperature, but I think the best way to use canned fruit is to put it in a saucepan, add sugar and some thickener (corn starch, corn syrup, etc) and let simmer for 5 mins before putting in the cake pan. This lets you use the entire jar of fruit and juice and gives you an opportunity to add citrus flavors if you wish.
I understand these are general instructions, however, it’s not complicated. You simply want cut, peeled fruit, with some syrup (if you want) on the bottom of the pan one way or another. You will find your favorite way of preparing the fruit in no time.
Cherry and Lime are featured in the Pictures. I used some whole tart cherries I canned last year, and the zest and juice of one lime. I used the method listed under canned fruits above.
Some fruit toppings to try:
- Rhubarb
- Rhubarb and Strawberries
- Strawberries and Lemon
- Cherries
- Cherries and Lime
- Blueberries
- Pears and Blueberries
- Apples
- Apples and Pears
- Peaches
- Pineapple
- Cranberries
- Cranberries and Orange
Any fruit for baking works well, though, and you can always add cinnamon to the toppings for extra oopmf.

That’s it!
Summer is a time of abundance and parties, and this cake is sure to please any crowd.
I make this for birthdays, potlucks, major holiday gatherings, or whenever I have some fruit that needs to be used but don’t want to preserve.
It’s a fan favorite for kids, also, even the picky ones at least like the cake portion.
Enjoy!
-Chelsea, The Cottage Vegetable
- What to Plant After the Garlic Harvest | Polyculture Vegetable Gardens
- Strawberry Rhubarb with Lemon Jam | Small Batch, Water Bath Canning
- Upside Down Yogurt Cake, Using any Seasonal Fruit Toppings
- Chive Blossom Vinegar
- Canning Plain Pumpkin (& how to purée it later) | Pressure Canning Recipe & Video


