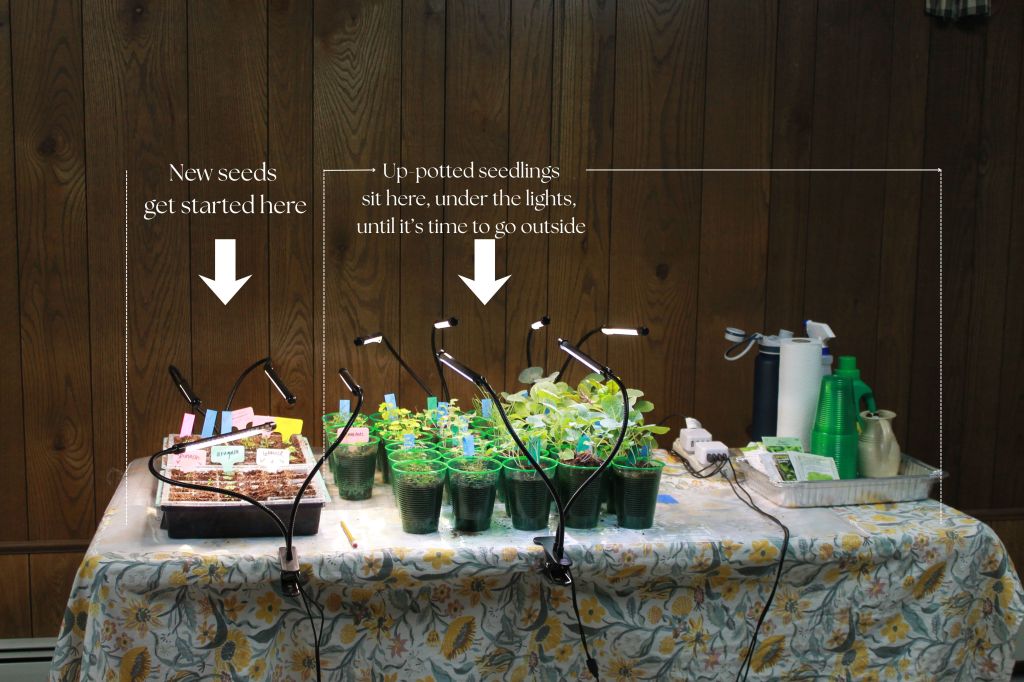
I can get my entire vegetable garden, plus some extra flowers, started on just one table!
I do not like to have a huge, fussy set up, and we do not have an outdoor greenhouse to retreat too. Over the years, I have figured out how to start my own seeds in a simple manner using the basics.
In this post, I am going over exactly how I set my seed starting table up that helps me keep things organized and streamlined during the spring time.
Let’s Dive In!
Seed Starting on One Table
*Please note the initial purchase of the supplies is the most expensive. After this, the only reoccurring purchases I make are new seeds, seed soil, and every few years I need to replace my cups (so very inexpensive after the first year).
Tools you Need
- Folding Table
- Seed warmer mat
- Seed starting trays
- Grow Lights
- Plastic Drinking Cups or Paper Garden Pots
- Seed starting soil
- Seeds & plastic seed labels
- Watering can
How I start my seeds on this one table:
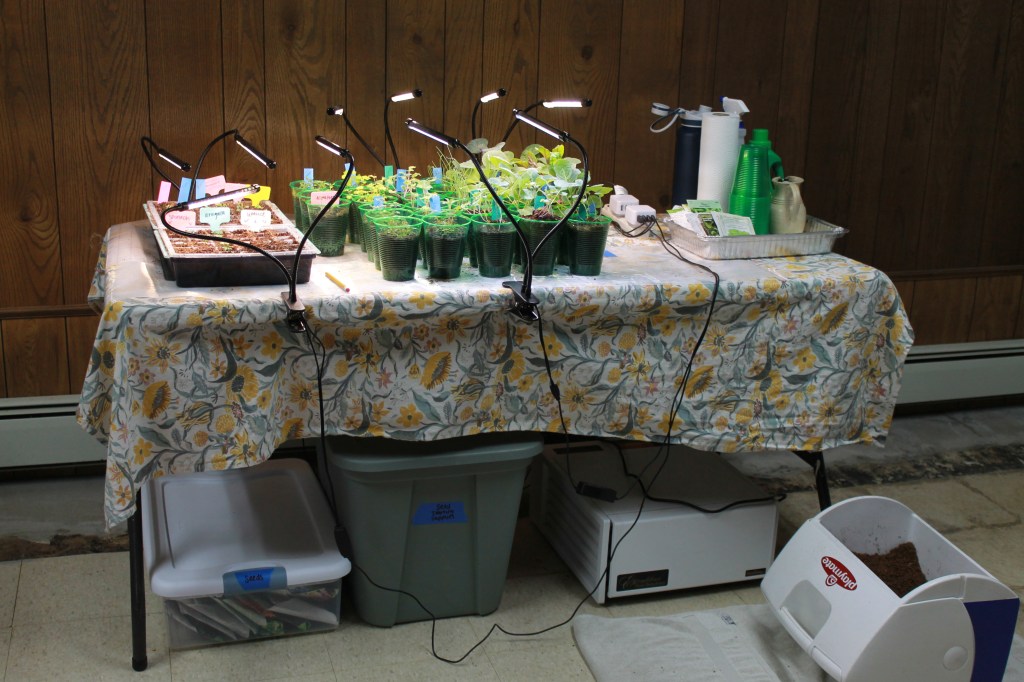
- Set your table up out of the way but in a place that it’s easy to access daily. I have mine in our basement, but any room or a garage that can stay close to room temperature will work (you do not need a window if you have grow lights). Just make sure you have an outlet nearby and it’s easy to access since this will need daily care. Make sure to use a tablecloth so the seed trays don’t slip around if the table is bumped into. I also recommend using a surge protector on your outlet.
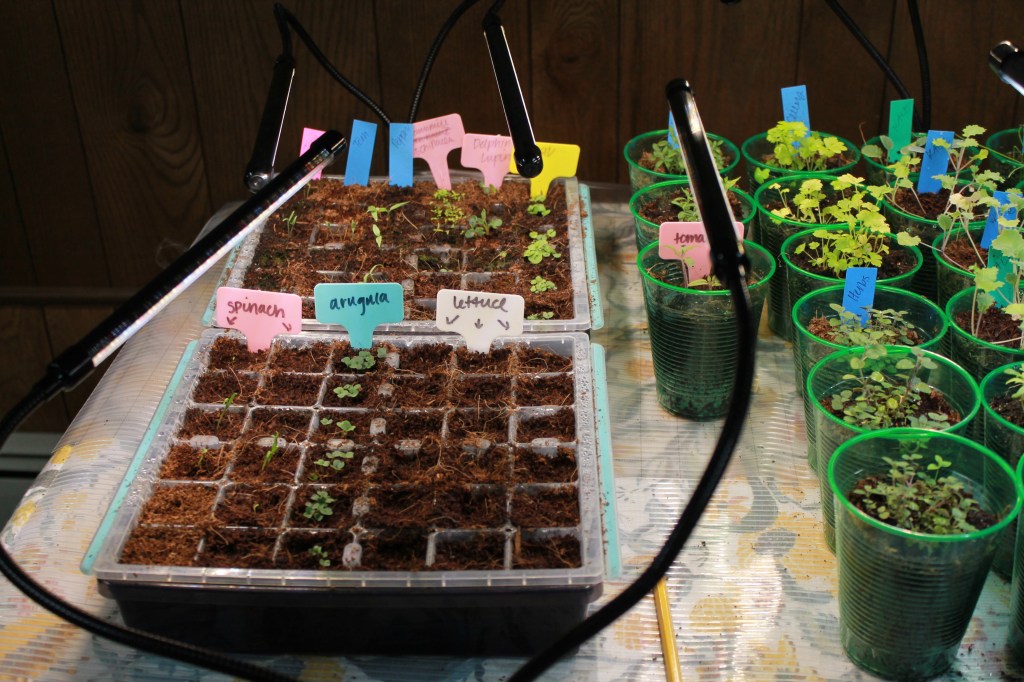
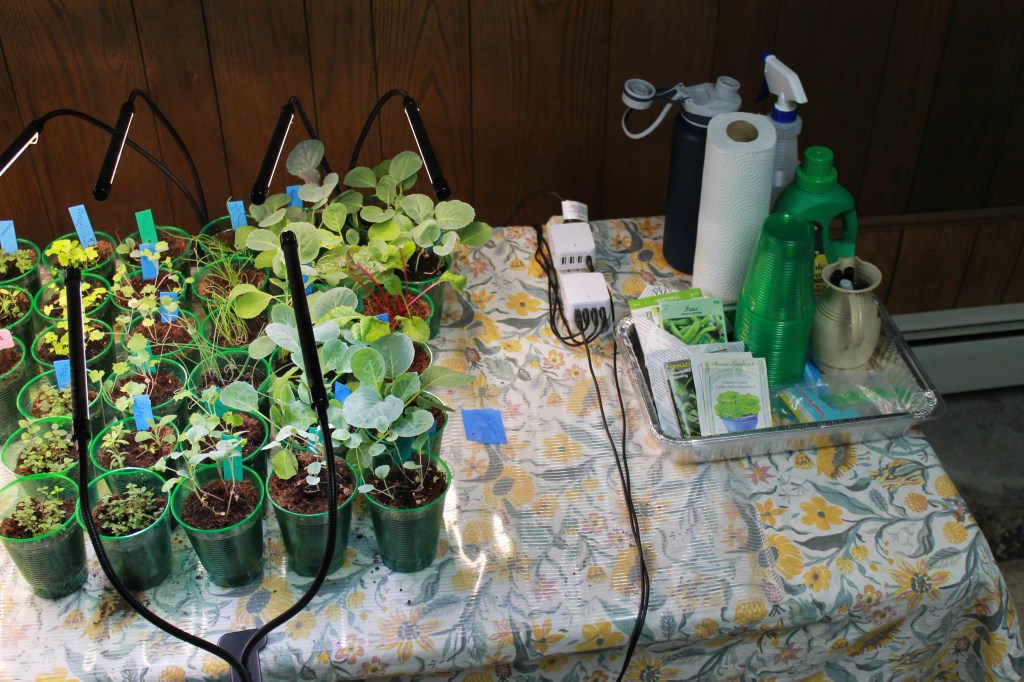
- Divide your table: I have created a factory line on the table; On the left side is where the brand new seeds will get started on, and on the right side is where seedlings will be up-potted into cups and kept until it’s time to plant outside. Be sure to use a power surge strip when plugging all these supplies in.
- On the left side: I am using one seed warmer tray, two grow lights, and two of my reusable Burpee seed starting trays. Seeds outgrow the tray quickly so two of the 36 count trays is enough.
- On the Right Side: This side is dedicated to the up-potted seedlings, and this is where they will sit until it’s time to take them outside. Plastic drinking cups can hold 4-5 plants each, depending on the plant. The drinking cups don’t leak water, don’t mold, and they have plenty of room for the plants to grow some good roots before transplanting. But if you want to be plastic free, I suggest getting some paper pots. I do not use a seed warmer mat at this point, but I will place as many grow lights as I need. I own 7 grow lights, and by the end of the seed starting season all of them will be used.
- Grow lights: https://a.co/d/00aV38Wx
- Starting Seeds: Please don’t overthink this part. Any seed starting soil will work, and please grab the seeds that you can afford! All seeds start in the seed starting trays on the left, no matter what. Wait until there are roots growing out of the bottom before transplanting into the cups/pots and placing them onto the right side of the table.
- Daily Care: Water seems to evaporate quickly on the seed warmer trays, so the plants will need to be watered daily. I also suggest fertilizing your seedlings once a week with a liquid fertilizer. This year I have used the Miracle-Gro Organic Plant Food, with great success. It’s easy to dilute into a water bottle and spray some at the root base every weekend. Be sure to thin your seedlings out as they grow. You will have more success in the long run with fewer, stronger seedlings than with multiple weak seedlings.
That’s It!
This table stays like this until the end of April/beginning of May (I am usually done with the seed starting trays by the beginning of april so this table soon becomes all cups with bigger sized seedlings).
Once it’s warm enough to get anything outside I will be placing all the cups in a clear tote box, and carrying them outside/into the garage to start the hardening off portion of starting seeds.
What you see in the pictures are all my cold crops (kale, cabbage, chard, etc), along with some of the veggies and herbs that need some extra time to get started (thyme, sage, rosemary, onions, celery, etc).
I purposely started early this year so I could get this post done so don’t worry if your seed starting doesn’t look like mine! (zone 6)
Starting seeds yourself can save tons of money, especially once you have purchased your lights, mats, and trays.
And growing anything in the garden will help supplement your grocery bill, and remember this does not have to be aesthetic!
Enjoy!
-Chelsea, The Cottage Vegetable
- Seed Starting Set Up | Minimal, Organized, Indoors
- Reputable Canning Resources
- Garden Planning Tips
- Spiced Cranberry Sauce | Water bath canning
- Creamy Chicken & Potato Soup | Canned Chicken Recipe
The Cottage Vegetable website is an AI FREE zone! Everything is written and photographed by myself, Chelsea.