- Grocery Stores and What that meant for my Pantry
- The Pantry Overhaul (no it did not cost money!)
- That’s It!
I did ZERO canning this year and I did a smaller garden this summer. And I don’t regret it. It was a productive summer nonetheless, but it’s over now and it’s time to move on.
That said, it’s time to get ready for a good “pantry challenge” this season; one where all my intentions towards feeding my family must come from our main pantry first.
But NO, this does not mean we will be running to Sam’s Club and spending thousands of dollars in stockpiling food. In fact, we are doing no preparation of that sort at all for this.
Instead, I am taking a different approach to it this year: getting my pantry built in a way that is more encouraging to be in by using grocery store tricks.
Grocery Stores and What that meant for my Pantry
My main pantry is in my finished basement; this makes up for the fact that my kitchen is small with limited storage for long term foods. The only foods I keep upstairs in the kitchen are refrigerator foods, open jars of baking supplies/pastas/spices/oils, and snacks that go quickly.
Let’s just say my basement became a cobweb infested dumping ground over the summer and it was pitiful looking (I do not have before pictures just imagine a mess with unorganized food and empty jars everywhere).
That meant that I had given my basement pantry a huge overhaul, and after finding several cans/jars of expired foods, I came to the stark realization that my ‘system’, or lack thereof one, was only setting me up for failure and food loss.
So, the idea of making it like a grocery store came to mind and I ran with it!
I researched how grocery stores make you buy more and floor plans they do, in hopes I could find inspiration for my own pantry.
Here’s a couple ways the grocery stores use to trick people into buying more:
- Creating a “sense of occasion” with seasonal displays in the front of the stores
- Placing high end items at the end caps and making sure high selling items are at eye level
- Modify the layout over time to make customers search the store more
- Placing the bakery and deli at the front of the store to entice customers with it’s smell
- Tricks with pricing
How did I translate this to my own pantry (more about these described below):
- Created a “special occasion table”, decorated with produce and seasonal decor
- Deep clean, Rearranged everything
- Made sure to place my “high end items”, which are items that need encouragement to use up faster, at eye level.
Now, I definitely did NOT want it to look like a grocery store but instead more of a cottagecore-root cellar style; you know the pretty ones you see on Pinterest? Not sure if I achieved that but I did want it to look like home and not a store.
I must say this is one area of your home that you can absolutely lean into ‘aesthetics’ with the function.
I mean ever wonder why Trader Joe’s is more “fun” to shop in than a disorganized Dollar Store? Because Trader Joes leans into its aesthetic with the function.
The Pantry Overhaul (no it did not cost money!)
That said, I first started with a good ol’ deep clean. I dug deep and moved everything out of the way so I can get the dust, grime, dog hair, and even mouse droppings underneath and off the shelves (our house is old and mice are inevitable; the classic snap traps are the best in my opinion).
Then I rearranged everything keeping in mind the tricks grocery stores use:
– I first put a dedicated corner for empty jars, and even decluttered some of them (dare I even say that yes, you CAN have too many jars? I might get banned from the cool kid club for that statement).
These jars sit in the back of the area on their own separate shelf unit and are now neatly organized by size. This is like my “back warehouse” of the pantry.
I also got rid of anything that was expired or was canned more than 2 years ago. If I didn’t touch it in the couple of years I’ve had it, then out it went!
This went for both storebought and home canned items with no exceptions. I made sure to throw out and clean those jars and put them away in a timely manner, too.
My goal here was to give myself a fresh start by getting rid of the pain points and ONLY kept stuff I knew for sure that was still edible or even appetizing for the upcoming winter.

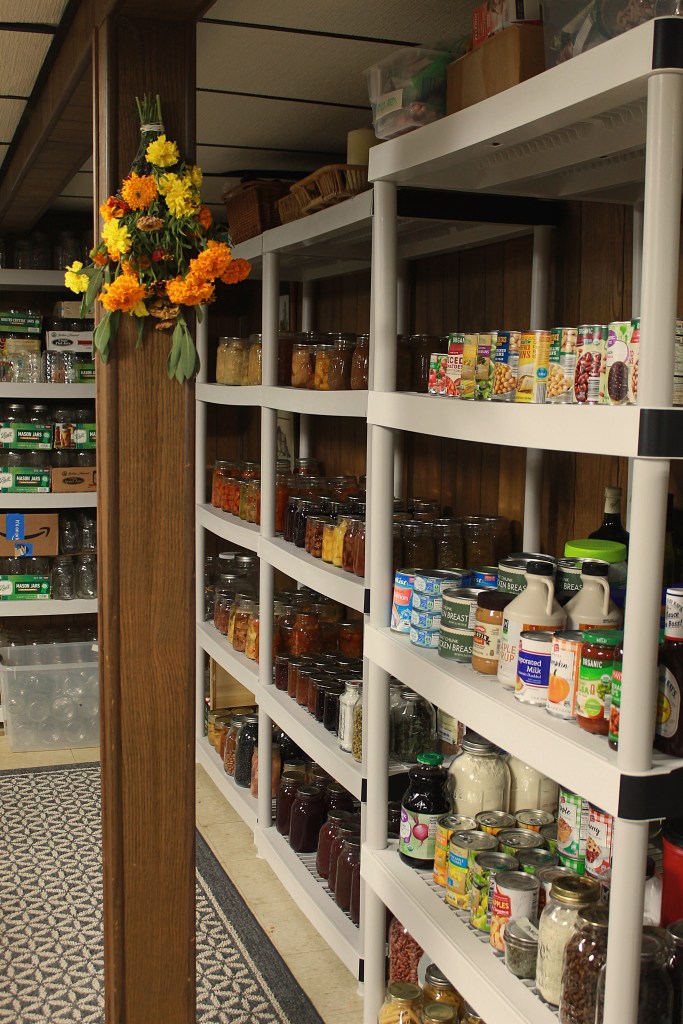
– After I got all my empty jars organized, I moved onto the other shelf units with canned items. I first started with my home canned items and set their shelf units up in the middle of the pantry area.
I did this simply because I knew I would need two shelves for my jars, and I had two shelves that were the same size for them (if you look closely below, the shelf with the storebought items is a different size).
I took a Clorox wipe and wiped down all the tops of the jars to get the dust off of them as I was organizing them. This gave the stash an instant face lift and made it far more appealing to grab from. I wish I had pretty fabrics on the tops of my jars, but for now I left them as is.
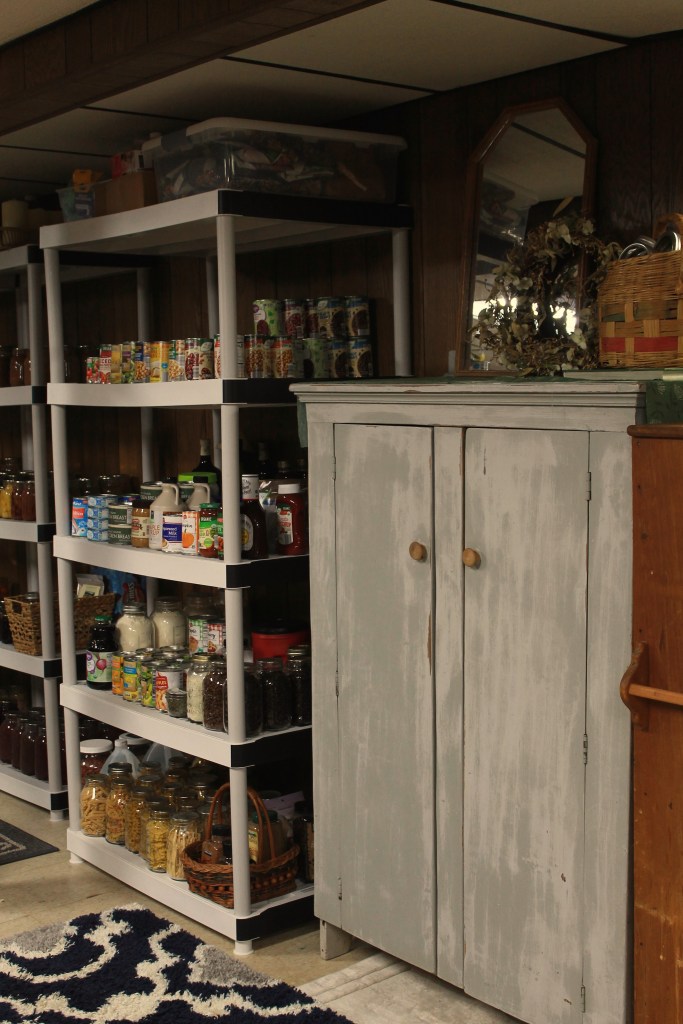
The storebought cans got their own dedicated shelf and I did the same cleaning treatment.
Taking inspiration from the grocery stores, I put my “high end” items at eye level; to me, this was making my ‘high end items’ be the ones that I need more motivation to use up. For us that’s fruit items.
I am not sure why, but we just struggle to get through our jars of fruit and jams but none the less they now sit squarely where I can see them every time I am down here.
My protiens, veggies, soups and juices then took over the other shelves; I simply just made sure were group together (all protein sources sit together, all veggies sit together, all soups, etc.)

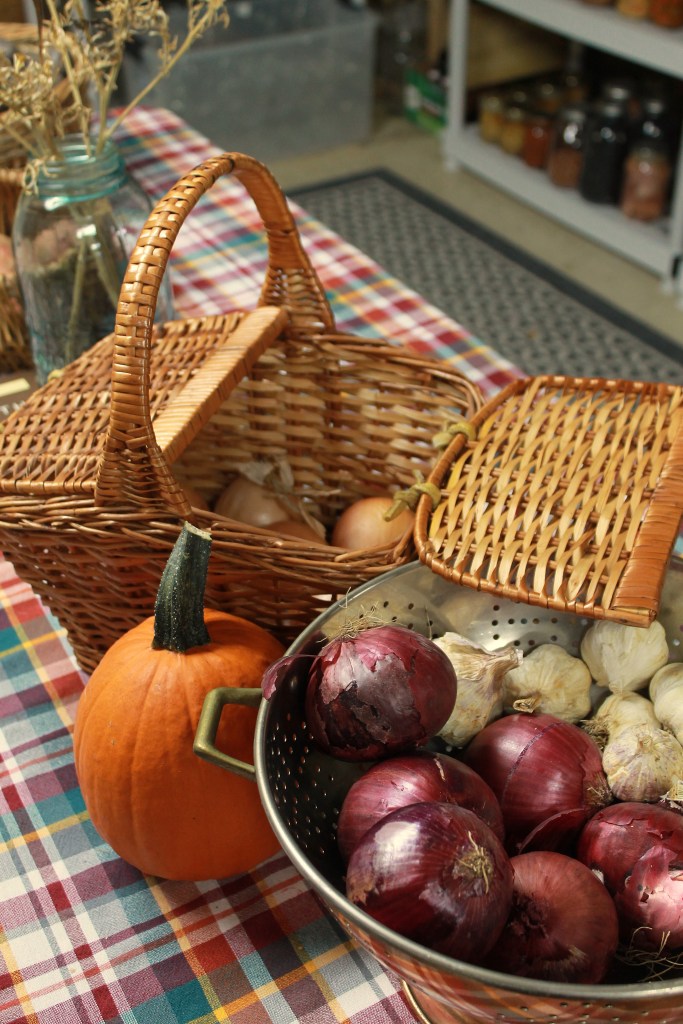
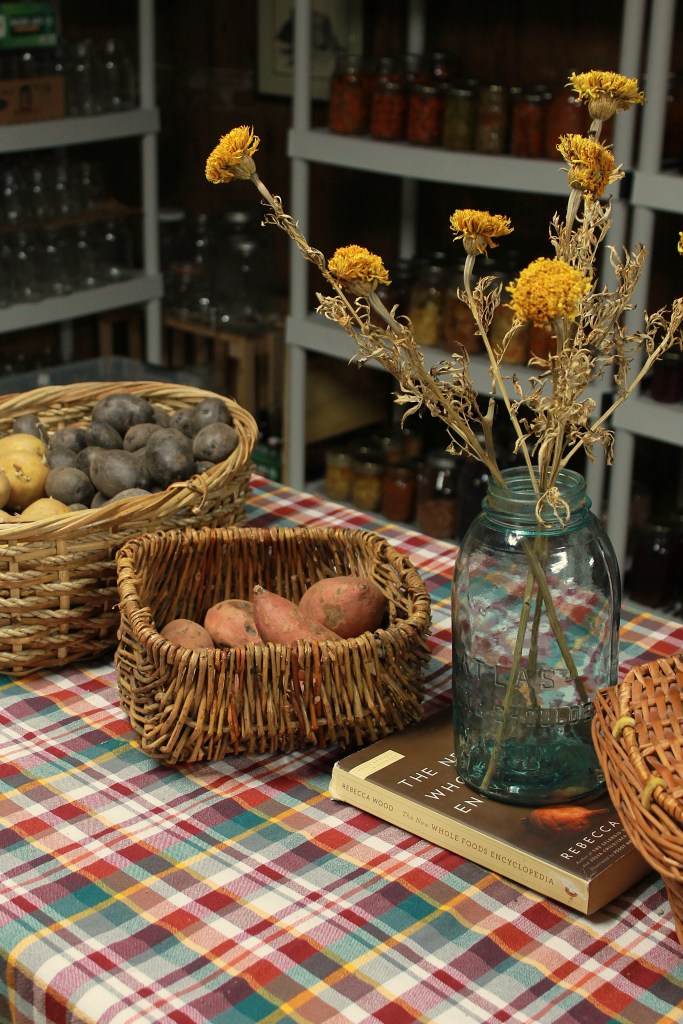
– After that I set up a fresh produce table; this is my “special occasion” table. And yes, this will change as winter goes on.
Now I will say fresh apples, bananas, oranges, and berries stay upstairs in the kitchen or in my fridge, but this table holds anything that can sit on a shelf for a few weeks: potatoes, onions, garlic, pumpkins, squash, etc.
I had a lot of fun putting this table together; I first grabbed what I had for tables from our garage and around the house.
All three are pretty beat up but they all sat next to each other well enough, so I then grabbed a fall-colored tablecloth and a quilt top that was unfinished to cover the sore look of the tables.
Next, I grabbed baskets and this colander to organize the produce. Now I did not want anything covered up because I do expect to use these up in a timely manner and replenish as winter goes on.
I then just grabbed a floral centerpiece for this; again, using what I had, I grabbed an old half gallon jar and some dried marigolds for now.
Everything is easy to see and easy to grab. These food items have the shortest shelf life down here so I did not want them hidden in any sort of way.
What’s not pictured is under the tables: I have totes that carry the rice, pancake mix, and extra pastas or flour. The table clothes keep this area looking clean and not too cluttered.
Thrifted rugs I had previously were added to help with the cold floors and help section off the areas.


-LASTLY, I got a side table to organize some fresh herbs, and my extra buckets of flour or sugars.
This, I still a work in progress but my plans are to find a thrifted dining room table to use. The only problem is that we are resting again the heaters on this wall, so my plans are limited to making sure it’s not blocked.
When I get this settled, I can update in a future post with pictures.
That’s It!
Phew, thank you so much for making it this far. I made along story short here, but this project was definitely invigorating and satisfying, because now I have a pleasant pantry area that is inviting to come into and has cranked the wheels on meal ideas for us.
It took me a solid week (in between homeschooling) to get this done.
By the way, my basement is finished but just outdated. It is an open concept basement, so furniture does a lot of heavy lifting when it comes to ‘sectioning off’ areas for different purposes.
Right now, our pantry challange rules go as follows:
- Only weekly purchases will be milk, butter, yogurt, fresh produce, special occasion cuts of meats we don’t buy in bulk (mainly steaks)
- Our budget is $100 a week for weekly grocery runs
- All meals must start downstairs with ingredients we already have AND I must consult my hard copy cookbooks (I am do this so I can declutter my cookbooks this season with intention)
- Have real intentions to finish leftovers or freeze them for later in a timely manner
For context, we completely feel off the rails this past summer; often relaying on frozen pizzas, quick sandwiches, and lots of convenient foods. Very little cooking went on this summer, sadly. But with this project done, I am ready to get back into the game again and start saving some money!
I am not sure how long we will follow these strict rules, but I can imagine this is how we will be for the long haul this autumn/winter season. Next summer it’s game on for gardening and preserving because I know we will need to restock the pantry by next summer.
I hope this gets you inspired to get going on your home. Remember what the grocery stores do and see what you can do for yourself. And thrift what you can first!
Enjoy, and see you in the next post!
-Chelsea, The Cottage Vegetable
- Seed Starting Set Up | Minimal, Organized, Indoors
- Reputable Canning Resources
- Garden Planning Tips
- Spiced Cranberry Sauce | Water bath canning
- Creamy Chicken & Potato Soup | Canned Chicken Recipe
The Cottage Vegetable website is an AI FREE zone! Everything is written and photographed by myself, Chelsea.


How inspiring, I love your thoughts, and have been trying to do something similar, but my spaces are scattered a little, as I don’t have a basement area to do what you have done. Thank you for the inspiration to keep on with the plan.
With kindness
Julie
LikeLike
Thank you so much! And yes, I remember our old house I didn’t have a basement either. I remember that I allowed myself to spend the money on a great cabinet/hutch at a thrift store to use for food items and that was in my dining room (it’s the grey one with two doors pictured above). At that house I also just kind of adapted our old dining room to be a part of the kitchen storage area too. I hope this helps a little more, and I am so happy to see that you found this inspiring, this overhaul has definitely been helpful to us. Best Wishes, and Happy Autumn!
LikeLiked by 1 person
Happy Autumn Chelsea, we are enjoying a little Spring (in Australia) it has been slow coming this year.
LikeLike